The Easiest Way to Record Your Screen in Windows: A Step-by-Step Guide
Do you want to send an urgent tutorial to someone? Want to know how to screen record? Learn how to screen record on Windows with built-in utilities and the best screen recorder for Windows.
Screen recording is a very useful feature. This feature has a lot of benefits, especially when you are sending some important tutorials. Like screenshots, screen recording serves you a lot of advantages. If a picture is a hundred times important, then a video is a million times worthy, especially for tutorial purposes. Nothing can be more useful than a video when you want to show someone how to do a task. Hence, you must know how to screen record.
Windows 10 comes with a built-in screen recording feature. However, this feature has some limitations. Therefore, this post will discuss the best ways to screen record Windows 10.
Manual Methods to Record Screen in Windows 10
There are various manual methods of screen recording on Windows 10. Still, here we will discuss two effective ways to screen record Windows 10.
Method 1: Record Screen with Xbox Game Bar
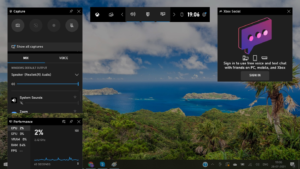
Windows 10 and above versions lets you record the screen with its built-in tool- Xbox Game Bar. This tool perfectly captures Xbox and PC gaming sessions along with any other activity on your screen. So, if you are a gaming enthusiast and want to showcase your gaming tactics, screen recording with Game Bar will be beneficial for you. To use this tool, follow the below steps.
Step 1: Go to the start menu and select the Settings option.
Step 2: In the Settings window, tap on Gaming.
Step 3: Proceed to the Game Mode to enable it.
Step 4: Go to Game Bar’s settings to check the maximum recording duration. You will get the Background recording option under Captures. Here, you can choose the option of recording duration from 30 minutes to 4 hours.

Step 5: You are all set to record the screen. However, remember that Game Bar only supports recording one app at a time on Windows 10. So, you can’t switch recording to another window.
Note: You can’t record maps, desktop, webinar, webcam feeds, meeting, online activity, conference calls, and all other screen activities including the gameplay.
Method 2: Record Screen Online on Windows 10
If you are thinking about how to record screen on Windows 10, then you can follow this method. For this purpose, you can use an online Windows screen recorder. Here, we will discuss an Online Screen Capture tool which is an excellent option for screen recording. To learn how to screen record, follow the below steps.
Step 1: Open Google Chrome and navigate to Screncapture.com.
Step 2: Adjust the settings then. To record the screen with audio, click on the Sound icon. To record a webcam or microphone, select the corresponding icons.
Step 3: Click the Start Recording button and select the specific area you want to record.
Step 4: Once you are done with recording, click on the Stop Recording option.
How to Record Screen with Advanced Screen Recorder on Windows 10
Advanced Screen Recorder is the best solution for recording videos. Also, it works excellently for taking screenshots during, before, or after screen recording and streaming content. This screen recorder lets you record video with system audio and the narrator’s voice with the microphone. With this tool, you can even record mouse clicks and mouse cursor. Moreover, with Advanced Screen Recorder, you can record HD video with audio.
Features
- Previews recorded videos and screenshots
- Excellent for video recording and live streaming
- Has different video recording and screen capture options
- Comes with an auto split and auto stop option
- Offers a schedule recording option
Pros
- Multiple Video Recording Modes
- All-in-One Screen Recorder For Windows PC
- Record screen activity, webinars, and streaming content limitlessly
- Record high-quality HD & 4K videos
- Add Personalized Watermark
Cons
- Limited trial version
How to Use Advanced Screen Recorder for Screen Recording
To screen record Windows 10 with Advanced Screen Recorder, you need to follow a few steps.
Step 1: Download the application from the official Advanced Screen Recorder website. Install it to unlock its features. You can go with the trial version or buy the software to avail of its features.
Step 2: Launch the app and select the specific mode you want to record the screen with. Hit the Record button.
Step 3: You will see a separate window where you can customize the audio recording settings. After customizing settings, click on the Start Recording button.
Step 4: Before the recording initiates, you will see a timer. Once the recording starts, you can annotate text on the video through the floating bar. You can pause or resume as you require. During recording, you can click on the camera icon to take screenshots.
Step 5: To end the recording, tap the Red Square button. The video will be saved. You can see the saved video under the Recording section.
Conclusion
So, screen recording is not rocket science anymore. Anyone can do it now by following the mentioned steps carefully. And when it comes to how to record screen on Windows 10, we can’t skip the influence of Advanced Screen Recorder. Undoubtedly, this screen recording tool is very useful. You can use it for both professional and personal uses. Its remarkable features will surely amaze you.


